
Tooling sketches
When I decided to build my bike, I committed to do everything I could by myself.
I was aware the composites side was complicate, it is safe to say that was right...
I can still not pretend I know how to design and manufacture a good and reliable composite part, because I understand it involves so much than just a 3D model and bulk prepreg in a mold cavity.
But the goal here was to give it a try, and learn.
At the beginning, I started to draft some mold design on my computer. I had this idea of building the swingarm with a single mold, a massive bloc in the middle, and cavities on each sides of this
bloc.


I knew also from a great article about the carbon V10 that a swingarm could be done with this two separated sides and bonded together. That is helpful to see this from big companies. But also a
little stressfull thinking the amount of work to do it.


For the front triangle, I wanted to use the mock-up as a pattern to build a split mold.
I did a quick mold design on Creo to check the whole thing


With all of that in my head, I was not sure on how to do it really.
Easycomposites, a UK company, was offering a 3 days
training with three chapters.
1/ Out-of-Autoclave Prepreg Carbon Fibre
2/ Resin Infusion for High Perf Carbon Fibre
3/ Composite Pattern & Mould Making
This was all I needed to see if I could continue the project by myself or not
Composites training course - introduction to composites techniques
Before attending the training, I 3D printed a small mold out of Polycarbonate filament, which reflected what I wanted to
do.
This was the extremity of one side of the swingarm.
I could then discuss the project with easycomposites team.


I had the chance to meet good people, they all had their respective crazy composites projects, from building stuff for an airplane cockpit to creating the most advanced carbon bike saddle...
Here is a mix of everything we did during the training. Prepreg, infusion and epoxy tooling.


With Paul from Easycomposites staff, we decided to reinforce my mold with an epoxy putty, and see if the whole thing could be use for Prepreg an whistand bladder pressure.
I went back at home with the mold reinforced and some Prepreg to do some test.
Thanks to Easycomposites 👍

My first prepreg laminating at home
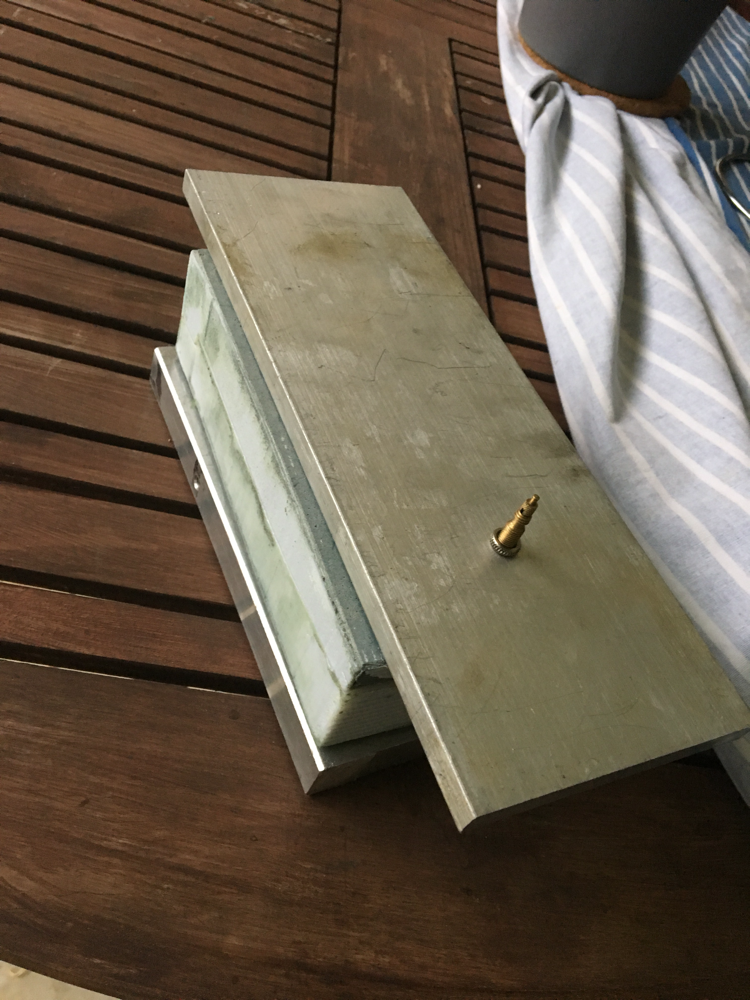
I wanted first to figure out the bladder technique I would use. So I used some wax sheet to offset the cavity by almost 2mm
Then I brushed some silicon and co-molded a presta valve for bladder inflation.
Then I got a silicon bladder ready to be placed in between the cavities that I would have laminated with 2 Prepreg layers.


I closed and bolted the mold, applied 1 bar and cured 8h at 80 degrees.
This was my first part, and I was happy with the result. The derailleur hanger off my Tallboy LTC fits perfect in its place.
However I never found the way to remove the bladder. So I decided to go for another technique.
At this step I knew I could use this mold construction for the swingarm molds.


Swingarm molds construction
I had a bit of design work before the swingarms molds were ready to print.
I did not have real information about where to put the parting line so the part will pop-off the cavities easily.
And so I made some assumptions...

I struggled printing with the polycarbonate filament and faced two issues. Sometimes the print unstick to the bed. Also, the layers delaminates during the print... I realized this was all about bed and room temperature. I try to figure this out, but never found out what were the reliable settings.
So I decided to cut the mold cavities in multiple pieces, that I would print separately and assemble afterwards.
I used a soldering iron to melt a filament which would bond one part to the other. This worked well.


Once prepared, the two sides were ready to be reinforced with the epoxy putty previously proved as a solid reinforcement.
I built a wood box that fit the contour of the mold.
It was then time to fill the upper side. And then the lower side.

After the resin has cured, it was the moment to see both cavities open, ready to be brushed with the release agent.👍

It is good to know that EasyComposites sell a great S120 epoxy board sealer which I used to coat the surface of the tool and help the release.

Front triangle mold construction
The front triangle is different from the swingarm in the sense that the parting line is in the middle,
I opted for a mold construction which use the 3D print as a pattern.
To help the placement of the pattern into a wood box, I printed some blocks with the negative shape of the frame. This makes a solid basement ready to receive pressure from the epoxy putty
compaction

For this, I first coated the PLA print with the same S120 epoxy spray. No way it could have release without this magical coat.

Once coated, and correctly placed inside the fixtures of the wood box, I created a flat contour out of plexiglass, and used wax to fill the gap between the pattern and the contour


6 coats of EasyLease release agent after, a first layer of High temp epoxy gelcoat was applied. And then a second gelcoat layer at the tacky stage of the first layer.
At the tacky stage of the second, the mold putty reinforcement was prepared to fill the mold cavities. Keeping the gelcoat tacky help the epoxy reinforcement to bond.


48h after, the mold can be open.
Once the fixtures were dismantled, a nice gelcoat layer became visible.
The pattern stayed in place for again 6 layers of release agent, and the exact same process of gelcoat and reinforcement is repeated.

What an incredible moment when the two sides were separated.
Stressfull but awesome !


At this step, the molds were almost finished.
An important equipment was missing : the oven.
Let’s see in next tab how I did it - click here