
Inflatable bladder - tricky problem
In the meantime of the other activities, I regularly search how to create a tailor and reliable bladder.
There are plenty of things to read and watch about the topic on the web.
I first thought I could do it with a simple technique, which consists of welding two polyethylene layers with a soldering iron, through a backing paper.
Here is an example of a bladder for a front triangle.

Some of my first trials were successful ....

However, multiple trials ended up with a leak.
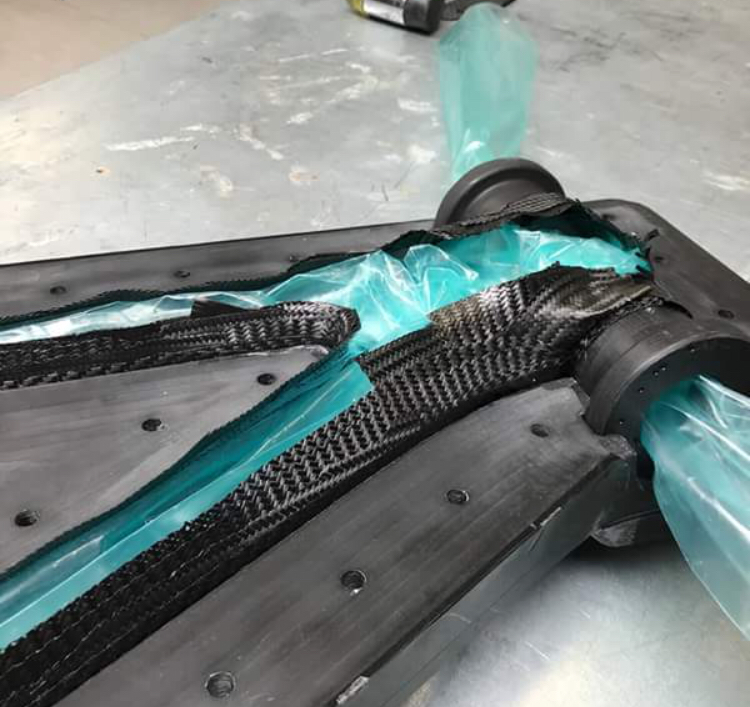
Considering the complex shape of the swingarm, I decided to look for another technique.
I found some explanation about EPS foam core. EPS stands for expanded polystyrene.
These are used by bike maker in industrial context.
However, I did not find sufficient information to continue with this.
Here are examples.


Another option was to use polyethylene sleeve, that can be find in roll.
One of my major issue was in the massive area like bottom bracket or head tube were I wanted an overlap of one halve on the other.
I felt this difficult to manage with a bulk sleeve.
Also, this require a constant air connection to be able to apply pressure in case of a leak.
I did not feel this solution convenient.
Here are example.


Some people on the internet told me silicon or latex could be used for bladder construction.
Piercan is a big manufacturer of latex, which can provide one off solution. However this require specific mandrels I
wasn’t able to provided.
So I repeated some of my previous work with brushed silicon, and tried some reinforcement which would help the bladder extraction.
Building these silicon bladder was time consuming, cause it require the placement of sheet wax to offset the cavities, and the brush of the silicon.
After that, the placement of a valve. And in the end, the solution wasn’t reliable with risks of leaks.
Here are picture of my work, which finally were not repeated.


I knew some people uses some butyl inner tubes wrapped with cling film for simple parts like tubes.
The use of a conventional inner tube which form a close circle wasn’t the most practical for my frame design.
By discussing with a friend, we found the idea of using linear inner tubes. It has the advantages to be straight and can enter from on side only inside the mold cavity.

For large section where I wanted some overlap, like the head tube, I wanted to combine these linear tube with foaming epoxy.
I found an expandable epoxy foam available at Sicomin store.
